Get your Kitchen ready for galentine's!

Charcuterie 101
If you’ve ever scrolled through Instagram and thought, “How do people make cheese look that good?” you’re in the right place. Charcuterie boards look way more complicated than they actually are. Once you know the basics, it’s just about layering flavors, colors, and textures, and trying not to eat everything while you build it (easier said than done!).
Mariah Henry
10/1/20252 min read
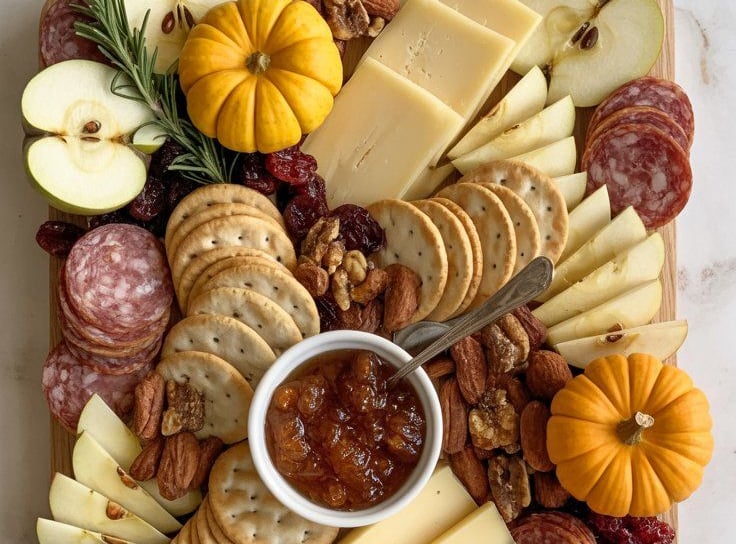
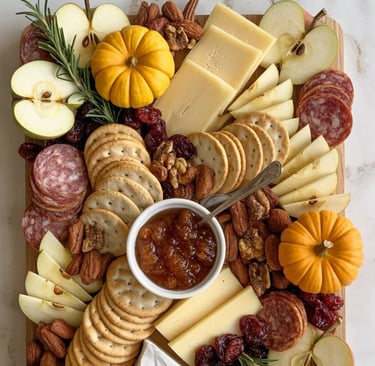
Step 1: Start With the Board
You don’t need anything fancy to start a cutting board, serving tray, or even a baking sheet will do the trick. Personally, I like to use a wood board because it looks timeless, holds up well, and photographs beautifully. I’ll link the one I use below if you want to snag the same one. Just make sure whatever you use is big enough to hold everything without looking overcrowded.
Step 2: Pick Your Proteins
Choose 2–3 types of cured meats - think prosciutto, salami, soppressata, or capicola. I usually grab my meats from Costco or Sam’s Club, since when you’re building a board, it’s typically for hosting a lot of people. Buying in bulk ensures you have plenty of proteins, because trust me, people graze way more than you think. Fold or roll the slices for that “wow” factor (and to make it look like you actually know what you’re doing). Sometimes I like to get really crazy and make the flowers!
Step 3: Choose the Cheese
Go for a mix of soft, hard, and something in between. Brie or goat cheese for creamy, aged cheddar or gouda for firm, and something fun like blueberry goat cheese or manchego for flavor. And don’t forget parmesan! I love adding chunks of it for a salty bite that pairs perfectly with just about everything. Cut a few pieces ahead of time so guests don’t hesitate to dive in.
Step 4: Add the Extras
Mix sweet and savory elements, grapes, berries, dried apricots, honey, olives, nuts, and crackers. The variety adds color and texture. If it feels random, good, that’s the charm.
Step 5: Fill the Gaps
Once the main items are down, fill every little space with small snacks or garnishes. Rosemary sprigs, fig jam, or tiny pickles make it look effortlessly abundant. Empty space is the enemy here.
Step 6: Pair It & Serve
Serve your board with wine, mocktails, or sparkling water or whatever fits. There’s no wrong way to enjoy it. Bonus points if you pretend you say "Oh, it's just a little something!".
Final Tip
My biggest tip is to always start with a centerpiece, whether it’s a big block of cheese, a bowl of dip, or a mountain of protein. From there, I build each side symmetrically, so it looks a little more put together than just tossing things on the board. It’s what I like to call organized chaos, there’s a method to my madness!
Happy Charcutering!
Oh, and here's my serving platter: Charcuterie Board